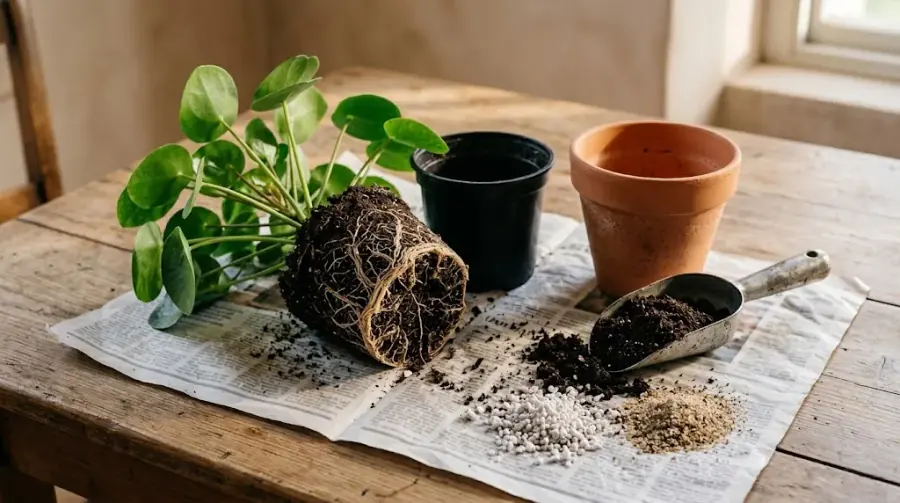
Repotting Is Not Routine Maintenance
A surprising number of plants arrive at our care line having been repotted to death. Repotting is a stressful event for a plant, not a treat. Done at the right moment it unlocks years of growth; done casually, or in the wrong season, it causes transplant shock that a plant may never recover from.
The honest rule: only repot when the plant asks for it. Most indoor plants need it every 18-24 months, not every year.
Six Signs Your Plant Actually Needs Repotting
- Roots growing out of the drainage hole. The clearest signal there is.
- Roots circling the surface of the soil in a tight spiral.
- Water runs straight through without soaking in — the pot is more root than soil.
- The plant dries out within a day or two of watering, every time.
- Growth has completely stalled during a normal growing season.
- The pot is physically distorting or the plant is toppling.
One or two of these can have other explanations. Three or more together means it is time.
When to Repot in Pakistan
Timing matters more here than in temperate climates, because our seasonal extremes are severe.
- Best windows: late February to April, and late September to October. Mild temperatures let roots re-establish without heat or cold stress.
- Avoid: May to July. Repotting during 45°C heat combines root damage with heat stress and is a common cause of death.
- Avoid: December to January. Plants are dormant and recover very slowly from disturbance.
- Emergency exception: if a plant has root rot, repot immediately regardless of season. Rot spreads faster than shock kills.
Choosing the Right Pot
Size — go one step up, no more
The most common mistake is jumping to a much larger pot to "save time later". An oversized pot holds far more soil than the roots can use, that soil stays wet, and the roots rot.
Move up by only 2 inches in diameter. A plant in a 6-inch pot goes into an 8-inch pot, not a 12-inch one.
Drainage is non-negotiable
The pot must have a hole. If you have a decorative ceramic pot with no drainage, keep the plant in a plastic nursery pot and place that inside the decorative one — then lift it out to water.
Material
- Terracotta: breathes and dries faster. Excellent for succulents, cacti and anyone prone to overwatering. Widely available locally and inexpensive.
- Plastic: retains moisture longer. Better for tropical foliage and for people who travel.
- Glazed ceramic: attractive, retains moisture. Check it has a hole.
Soil Mixes You Can Make Locally
Bagged "potting soil" sold at many Pakistani nurseries is often heavy garden soil that compacts and suffocates roots. Mixing your own is cheap and far better.
For succulents and cacti
- 1 part potting soil
- 1 part coarse sand
- 1 part perlite
For tropical foliage (Philodendron, Aglaonema, ZZ)
- 2 parts potting soil
- 1 part coco peat
- 1 part perlite
The goal in both cases is a mix that holds some moisture but lets excess drain away within seconds.
The Repotting Steps
- Water the plant a day before. Moist soil holds together and slides out cleanly; bone-dry soil crumbles and tears roots.
- Prepare the new pot. Add a layer of fresh mix to the bottom, enough that the plant will sit at the same depth as before.
- Ease the plant out. Support the base of the stem, tip the pot sideways and slide. Never pull by the stem. If it is stuck, squeeze a plastic pot or run a knife around the inside edge.
- Inspect the roots. Healthy roots are firm and white or light tan. Rotten roots are brown, soft and smell sour — trim them off with clean scissors.
- Loosen the root ball gently if roots are circling tightly, so they grow outward rather than continuing the spiral.
- Position and backfill. Centre the plant, add mix around the sides, and press lightly. Leave about an inch below the rim for watering.
- Water thoroughly once, until it drains from the bottom. Then empty the saucer.
The First Two Weeks After
This aftercare period decides whether the repot succeeds.
- Keep it out of direct sun for 7-10 days. Bright indirect light only.
- Do not fertilise for at least a month. Fresh mix already contains nutrients, and damaged roots burn easily.
- Water less than usual. Fresh soil retains more moisture and the reduced root system takes up less.
- Expect some drooping. A little wilting for a few days is normal transplant shock. It should pass.
Resist the urge to "help" a shocked plant with extra water or feed. The single best thing you can do is leave it alone in stable conditions.
When Not to Repot at All
Some plants actively prefer being snug. Sansevieria, ZZ Plant and many succulents flower and grow better slightly root-bound. If the plant looks healthy and is growing, leave it alone — a tight pot is not a problem on its own.
Questions About Your Plant?
Send a photo of the roots before you repot and we will tell you whether it is ready. Our WhatsApp care line is open to every customer, permanently.
Shop the Guide
Everything you need to get started.